- Combine sugar, salt, cream, and vanilla extract, if using, in the bowl of a stand mixer fitted with the whisk attachment. …
- Use immediately, or cover and refrigerate until needed, up to 8 hours.
We love whipped cream. But here’s what we love even more than whipped cream: Homemade whipped cream. Is there any dessert that a dollop of this creamy, dreamy stuff can’t improve? Yes, the aerosol can substance is suitable for squirting into your mouth while in front of an open refrigerator. But the homemade pie, which is richer and silkier, is the best way to dress a pie. Its also easy to make at home. Just dont make these common whipped cream mistakes.
When baking, it’s frequently best to start with ingredients that are at room temperature (if you’ve ever tried to beat together cold, hard butter and sugar, you understand why). However, it is preferable to begin with chilled dairy when making whipped cream because the fat globules emulsify more quickly and remain emulsified longer when cold. Start with a cold mixing bowl and cold electric mixing attachment for an even more effective whipping, advises digital food editor Dawn Perry. Before beginning, simply place them in the freezer for 10 to 15 minutes. 2. Use Organic Cream at Your Discretion.
When possible, we choose locally produced and organic ingredients; if you do as well, that’s great. We commend you if you purchase your cream from the local farmer. Just be aware that it won’t be as bright white or as smooth and creamy as regular, ultra-pasteurized cream, according to test kitchen contributor Jessie Damuck. Ultra-pasteurized dairy is often labeled as UHT, or ultra-high temperature. “You can absolutely use organic,” she says. Just be aware that it won’t perform as predictably as the varieties found in grocery stores. It tends to be grainy and yellow in color. “3. Be Sure Not to Over- or Under-Sweeten.
Whipping cream is typically consumed with dessert, whether dolloped on pie, spooned on pudding, or served with berries. Because the pies, puddings, and berries are already sweet, adding a ton of sugar to the whipped cream will make the meal sound clunky and one-note, which will damage your teeth and palate and leave you feeling sugar-strung out. For instance, the whipped cream topping on this butterscotch pie, which is already perfectly sweet, is unsweetened. Associate food editor Claire Saffitz recommends starting with one tablespoon of sugar per cup of cream and increasing to two for a sweeter whipped cream as a general rule. Whipping cream is the exception to the rule even though we always recommend adding a pinch of salt when baking. Even a tiny pinch will give whipped cream a salty flavor. 4. Choose—and Incorporate—Your Sweetener Wisely.
Confectioners sugar is the preferred sweetener for whipped cream in the Bon Appétit test kitchen. Its ultra-fine and dissolves into the cream quickly. Additionally, according to Saffitz, the sugar’s tiny amount of cornstarch helps stabilize the cream, keeping it pert and perky Confectioners sugar, also referred to as powdered or 10X sugar, should not be added to cream until peaks have already started to form; otherwise, cornstarch won’t serve as a stabilizer. You can certainly use regular granulated sugar in your whipped cream, but add it first so it can properly dissolve into the mixture before you start beating.
If you don’t like white sugar, maple syrup or agave nectar are the best alternatives; just fold them in gently with a rubber spatula once the cream has set. Never use more than two tablespoons of any liquid, including bourbon or a liquid sweetener. If you like honey, Perry suggests letting the cream and honey infuse at room temperature first, then chilling it and continuing. Otherwise, the thick, sticky honey will be challenging to blend in. Saffitz advises against using date sugar or coconut sugar for whipped cream, even though we enjoy them. These sugars are comprised of tiny pieces of coconut and dates, and no matter how hard you try, they simply won’t dissolve in the cream.
Egg whites are the only substance you should be whipping to stiff peaks (meringue, anyone?) Heavy cream, however, should be approached with a lighter hand. If you overwhip your dairy, the whipped cream will be unattractively thick and dense. Additionally, the milk solids may separate, putting you halfway to butter. One surefire way to prevent overbeating your cream is to do it by hand. (Whoever heard of serving pumpkin pie with butter?) Perry and Damuck agree that it is worthwhile to make the extra effort. Even when she uses an electric mixer, she always stops it before the cream sets and adds the final few strokes by hand. “With an electric beater, your cream can over-whip if you look away for a split second,” she warns.
If you decide to beat the cream by hand, be sure to use the right equipment. A sizable balloon whisk will effectively incorporate air into the cream. A tiny, narrow sauce whisk just won’t do the cream, um, justice.
Simply drizzle in some unwhipped cream and incorporate it if you go too far. There is only one thing to do after making butter: begin making toast. 6. Dont Be Afraid to Make it in Advance.
There’s no need to keep your family or guests waiting while you frantically whip cream in the kitchen. Whipping cream can be prepared in advance; err on the side of underbeating. Just whisk it back to life just before serving after storing it in the refrigerator. This.
How do I know when my whipped cream is done? Soft peaks vs. stiff peaks
The answer to your excellent question is that it depends on what you plan to use it for. Usually, recipes call for whipping cream to soft, medium, or stiff peaks. This lingo is used to describe how substantial and thick the cream is. You’ll observe that the cream appears thicker and more sturdy the longer you whip it.
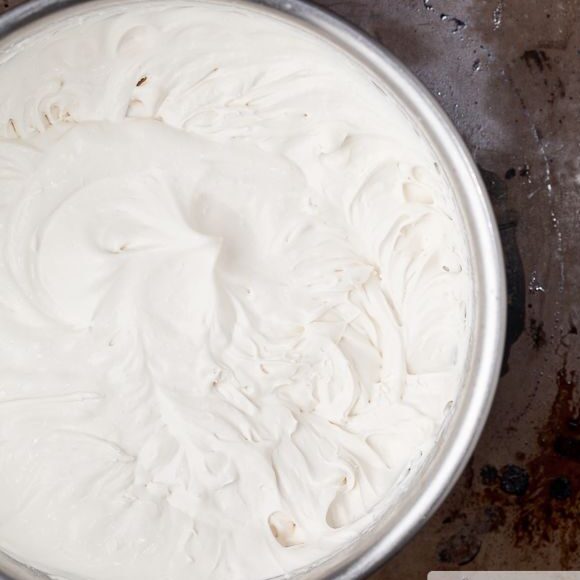
When whipping cream, the term “soft peaks” describes the early stages when the cream is just beginning to incorporate air and change from a liquid to a scoopable cream. The peaks should curl down if you lift up the beaters and take a look. Soft peaks have a softened texture and lose their shape over time.
Medium peaks is the next whipping stage. They maintain their shape reasonably well, but when the beaters are lifted, the tip of the peaks still slightly curl.
Longer-whipping cream is referred to as having stiff peaks because of its appearance. It will look almost like ice cream or frosting. When the beaters are raised, the peaks will stand straight up and look firm. (Caution: Don’t whip your cream too much at this point. If you whip the fat for too long, it will separate and turn into homemade butter.
Note: If you are whipping cream to use as a topping and aren’t following a recipe, I suggest aiming for medium to stiff peaks. When dolloped on top of a dessert, this will have a pleasing texture and hold its own. Choose stiff peaks if you want to pipe your whipped cream.
I add some sugar and vanilla extract to the whipped cream topping to give it a wonderful flavor. However, you can also use other extracts, such as orange, almond, or coconut extracts; if you don’t want it to be sweet, you can even omit the sugar.
Additionally, you can experiment with adding cocoa powder, instant coffee or espresso powder, fruit puree, seedless jams, citrus zest, melted chocolate, or a dash of booze. The possibilities are endless!.
It is best to add powders like coffee or cocoa at the beginning of whipping so they can dissolve. When using alternative ingredients, whisk the cream until soft peaks begin to form, then add the ingredients just before they begin to form. Alternatively, once the whipped cream is prepared, you can gently fold them in.
Here are some measurement options if you want to flavor all of the whipped cream in this recipe:
Following the addition of the flavoring, whisk a little to combine before tasting and adding more as necessary to suit your personal preferences.

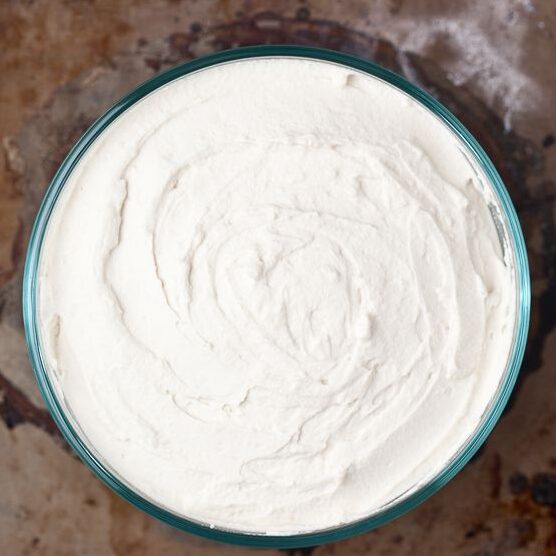
Stabilized whipped cream can be made days ahead of time
Use stabilized whipped cream to frost cakes or pipe long-lasting swirls onto nearly any dessert when you want a light, fluffy frosting.
You’ll appreciate being able to prepare stabilized whipped cream in advance, store it in the refrigerator without having to worry about it becoming runny, and use it when you’re ready to go. This whipped cream recipe is one that I frequently prepare in bulk and store in the refrigerator in an airtight container until I’m ready to use it.
Even better, you can go ahead and pipe or frost your cakes, cheesecakes, cupcakes, and other baked goods with this incredibly simple whipped cream recipe. and safeguard it in the refrigerator until you’re ready to serve. I always completely top my white chocolate raspberry cheesecake with this whipped cream when I make it, and I store it in the refrigerator for a couple of days before serving.
Tips to thickening whipped cream (stabilizing)
FAQ
How far in advance can you whip cream?
If kept chilled, whipped cream can be made up to 24 hours in advance. After this amount of time, it may start to separate. The cream should be stored in a fine-mesh strainer over a bowl for the best storage results. That way, any liquid will leak into the bowl underneath.
Can I prepare whipped cream ahead of time?
Here’s how to prepare it in advance: Whip the cream as usual (with vanilla and sugar or whatever), but beat it until it is not quite as stiff as you would like it to be. Several hours or even a day or two before you need it, cover the bowl and place it in the refrigerator.
How long does whipped cream last in fridge once whipped?
In the refrigerator, homemade whipped cream lasts for about a day. Gelatin, cornstarch, non-fat powdered milk, or a commercial whipped cream stabilizer (like Whip It) can all be used to thicken it. Because of this, it can last for up to 3 to 4 days without suffering a significant quality loss. If you need more time, you can freeze it.
How long does homemade whipped cream last in the fridge?
When stabilized, homemade whipped cream can keep for up to 4 days but only for about a day when it isn’t. Aerosol whipped cream lasts for a few weeks after the expiration date printed on the canister. Products with whipped topping that are sold frozen in tubs last for months and for up to two weeks after being defrosted in the refrigerator.
